You are using an out of date browser. It may not display this or other websites correctly.
You should upgrade or use an alternative browser.
You should upgrade or use an alternative browser.
Team Green....Kawasaki !
- Thread starter NQ1965
- Start date
NQ1965
PR Elite
I definitely need to put some mileage on my AHRMA card this year. I'll just have to see what I can possibly get to, and what I can't.
As usual our calendar will be full for the first half of this summer. At work our capital-project schedule is jam packed and it's one project staged after the next clear through December, so the OT requirement will be high. And then our 9yr old, 8yr old and 6yr old are all playing ball this season, and papaw has to work with them daily and then help coach the teams. But I have made up my mind that I will race more than I did last year. Somehow!
As usual our calendar will be full for the first half of this summer. At work our capital-project schedule is jam packed and it's one project staged after the next clear through December, so the OT requirement will be high. And then our 9yr old, 8yr old and 6yr old are all playing ball this season, and papaw has to work with them daily and then help coach the teams. But I have made up my mind that I will race more than I did last year. Somehow!
Last edited:
NQ1965
PR Elite
Ok, so I've made a smidgen of progress on the slow-poke rebuild here, (or at least I think I did  ).
).
First order of business was engine bearing and seal changes.
Before I began the first thing I did was check my new crank bearings and seals on the newly reworked crankshaft. The seals fit very nicely and were definitely a huge improvement over the hard worn out seals being replaced. The new bearing fit on the other hand did not please me quite so much. The bearings correctly fit, but, as with the old ones, are not quite as tight on the crankshaft as they should be. It really makes me wonder about that too because I don't believe that the engine has been apart before or had crank work done? There aren't any signs on the crankshaft halves of bearing wear either? I didn't have much difficulty splitting the cases and won't have much difficulty reassembling. I'm just wonder if this was a manufacturing error when built. There isn't any sloppiness and it does take some firm pressure to force them down on, but I can do it by hand. We'll just have to see I guess. We will know once the engine parts expand with temperature while running.
You know, when you get this far into a rebuild you want everything to be perfect, easy, and go exactly as it all should, but I am learning that it's a challenge. For me, it's a little frustrating and I struggle with having the patience to stop where I am at to think through the situation to make the best decision. I just want the son-of-a-bitch done because I don't have time for this, but I love doing it, and I learn soooooo much. I like knowing my bikes inside and out. But I am a hack amateur racer on a budget just trying to keep my machines together, reliable and hoping for a good experience at the checkered flag.......................... Can anybody relate ?
When I rebuilt my Yamaha MX250 a couple of years back I used the oven/freezer method for removal and install of the bearings. This time I used a heat gun and got them out, and in, much easier and faster.

All right, it's time to open up another "best practices" discussion with my respected Moto-Bretheren colleagues, which I do respect, welcome and appreciate.
Early on in this thread we talked at length about lapping the case halves using Diamond Paste and a surface plate. Well I had to do a lot of thinking on this, and here is where I ended up.
The thought occurred to me that if I used diamond paste on a surface plate, while I am circling the case half across the surface plate I will true up the mating surface of the engine case.....BUT, at the same time, I am also wearing the face of my surface plate with the diamond paste, rendering it inaccurate afterward.
So, I did some searching and reading on the internet and came across an forum article on this where Eric Gore had posted in on servicing these old 80's Kawi's and mentioned that it was standard procedure to tape emory paper to a surface plate for truing up the case halves. This was music to my ears. And I happened to have new, full sheets of "Fine" grade, wet/dry, emory paper in my bench.
So I grabbed the surface plate and duct tape and went to work.
I have to say that I greatly appreciate the advice I have been given on this project and the good info from the internet because it is extremely cool when you see the results and the confidence that it gives you that you've done a good job on this. After some work on the surface plate, I set new centering dows and re-mated the case halves together, and WOW.... could I tell the difference!

I didn't do any of this on my MX250.
On a side note, one of the things that I have always loved about these old Kawi's is the tiny engine cases. It sort of looks weird to be so small to have so much going on inside. (Especially compared to my Allis Chalmer Yamaha MX250 engine)

I even pulled the studs and refaced the cylinder mating surface. It actually took some work to get it all trued up

Now I have a couple of hours of clean up and transmission inspection work to do before I start piecing it back together.
Another thing that I learned while internet searching on re-facing and mating case halves was the subject of reviewing the air flow through the engine for performance gains, and then doing massaging and porting for improvement.
I came across pictures where you install the cylinder on one of the case halves so that you can inspect all of the airflow transitions where the parts mate together and then look for points that might impede smooth flow.
I did this last night and studied it pretty hard with particular focus to the air/fuel flow at different piston position points and I seen areas that could be improved on my KDX engine.
If you look at the crankcase halves you can see that there are squared edges that could be rounded over for better flow down into and then out of the lower end and into the cylinder ports.
Unfortunately I just don't have the time to do this now and must get this engine back together soon, but it became abundantly clear to me that what I need, and am going to do, is buy me another "back-up" KDX175 engine to build for performance.
).First order of business was engine bearing and seal changes.
Before I began the first thing I did was check my new crank bearings and seals on the newly reworked crankshaft. The seals fit very nicely and were definitely a huge improvement over the hard worn out seals being replaced. The new bearing fit on the other hand did not please me quite so much. The bearings correctly fit, but, as with the old ones, are not quite as tight on the crankshaft as they should be. It really makes me wonder about that too because I don't believe that the engine has been apart before or had crank work done? There aren't any signs on the crankshaft halves of bearing wear either? I didn't have much difficulty splitting the cases and won't have much difficulty reassembling. I'm just wonder if this was a manufacturing error when built. There isn't any sloppiness and it does take some firm pressure to force them down on, but I can do it by hand. We'll just have to see I guess. We will know once the engine parts expand with temperature while running.
You know, when you get this far into a rebuild you want everything to be perfect, easy, and go exactly as it all should, but I am learning that it's a challenge. For me, it's a little frustrating and I struggle with having the patience to stop where I am at to think through the situation to make the best decision. I just want the son-of-a-bitch done because I don't have time for this, but I love doing it, and I learn soooooo much. I like knowing my bikes inside and out. But I am a hack amateur racer on a budget just trying to keep my machines together, reliable and hoping for a good experience at the checkered flag.......................... Can anybody relate ?
When I rebuilt my Yamaha MX250 a couple of years back I used the oven/freezer method for removal and install of the bearings. This time I used a heat gun and got them out, and in, much easier and faster.
All right, it's time to open up another "best practices" discussion with my respected Moto-Bretheren colleagues, which I do respect, welcome and appreciate.
Early on in this thread we talked at length about lapping the case halves using Diamond Paste and a surface plate. Well I had to do a lot of thinking on this, and here is where I ended up.
The thought occurred to me that if I used diamond paste on a surface plate, while I am circling the case half across the surface plate I will true up the mating surface of the engine case.....BUT, at the same time, I am also wearing the face of my surface plate with the diamond paste, rendering it inaccurate afterward.
So, I did some searching and reading on the internet and came across an forum article on this where Eric Gore had posted in on servicing these old 80's Kawi's and mentioned that it was standard procedure to tape emory paper to a surface plate for truing up the case halves. This was music to my ears. And I happened to have new, full sheets of "Fine" grade, wet/dry, emory paper in my bench.
So I grabbed the surface plate and duct tape and went to work.
I have to say that I greatly appreciate the advice I have been given on this project and the good info from the internet because it is extremely cool when you see the results and the confidence that it gives you that you've done a good job on this. After some work on the surface plate, I set new centering dows and re-mated the case halves together, and WOW.... could I tell the difference!
I didn't do any of this on my MX250.
On a side note, one of the things that I have always loved about these old Kawi's is the tiny engine cases. It sort of looks weird to be so small to have so much going on inside. (Especially compared to my Allis Chalmer Yamaha MX250 engine
)I even pulled the studs and refaced the cylinder mating surface. It actually took some work to get it all trued up
Now I have a couple of hours of clean up and transmission inspection work to do before I start piecing it back together.
Another thing that I learned while internet searching on re-facing and mating case halves was the subject of reviewing the air flow through the engine for performance gains, and then doing massaging and porting for improvement.
I came across pictures where you install the cylinder on one of the case halves so that you can inspect all of the airflow transitions where the parts mate together and then look for points that might impede smooth flow.
I did this last night and studied it pretty hard with particular focus to the air/fuel flow at different piston position points and I seen areas that could be improved on my KDX engine.
If you look at the crankcase halves you can see that there are squared edges that could be rounded over for better flow down into and then out of the lower end and into the cylinder ports.
Unfortunately I just don't have the time to do this now and must get this engine back together soon, but it became abundantly clear to me that what I need, and am going to do, is buy me another "back-up" KDX175 engine to build for performance.
Last edited:
NQ1965
PR Elite
Was getting ready for work this morning, but thinking about getting this engine done. I dug out my brand new tube of Yamabond 5 that I've had on the shelf for a while. Looked at the date on the back of the package and it said 3-21-2013. Ooops! The tube has never been pierced and is still soft and squeezable but I'm afraid to chance it.
Looks like an Iron Pony trip this afternoon.
Looks like an Iron Pony trip this afternoon.
NQ1965
PR Elite
And a little further today. Home from work at 1:00pm, 66 degrees and not snowing, was able to work with the garage door open for once.
Spent much of last night cleaning all the critical areas and looking over and cleaning the tranny components.
This is my second rebuild and I have to say John, I'm not sure how you paint up your case halves and then do your reassembly without scratching and scuffing the new paint work up? I know for sure that I would of messed it up today. Anyway this bike is being built to bang up and battle, she'll get a good scuffing up and fresh top coat when all the pieces are in place.
Getting all of the guts to these engines back into workable order is no small task for me, is often painstaking, and usually takes me more than try to get it correct. I had to re-open the case twice to get it right today.

My Motion Pro T-Handle JIS driver was the tool of the day. Not one rounded out screw head.

Earlier I mentioned that I studied over the shape of lower end air-fuel passages by installing the cylinder on one case half and seeing how the pieces work together. But seeing the case halves together with the crank in place makes me see it differently and I realize that I will have to study this over a lot more really know what mods would really be positively effective. That's a pretty tight cavity there.

Spent much of last night cleaning all the critical areas and looking over and cleaning the tranny components.
This is my second rebuild and I have to say John, I'm not sure how you paint up your case halves and then do your reassembly without scratching and scuffing the new paint work up? I know for sure that I would of messed it up today. Anyway this bike is being built to bang up and battle, she'll get a good scuffing up and fresh top coat when all the pieces are in place.
Getting all of the guts to these engines back into workable order is no small task for me, is often painstaking, and usually takes me more than try to get it correct. I had to re-open the case twice to get it right today.
My Motion Pro T-Handle JIS driver was the tool of the day. Not one rounded out screw head.
Earlier I mentioned that I studied over the shape of lower end air-fuel passages by installing the cylinder on one case half and seeing how the pieces work together. But seeing the case halves together with the crank in place makes me see it differently and I realize that I will have to study this over a lot more really know what mods would really be positively effective. That's a pretty tight cavity there.
NQ1965
PR Elite
Damn the cost of a good night's sleep !!!
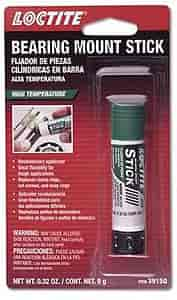
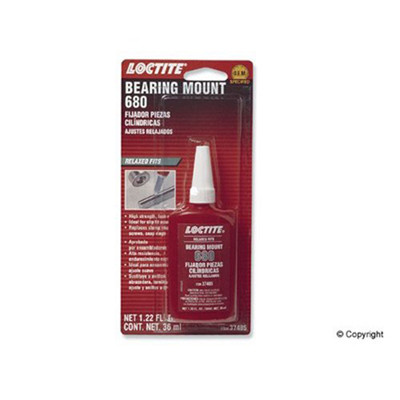
Well I'm going to split the case open one more time. I got to talking to long time dirt biker buddy ("misstheflip's" dad, John ) and pretty much a master mechanic by trade. Told him about my crank bearing fit concern and he told me that there's an easy fix for that. It's called Bearing Loctite. John had seen this issue before.
I done a quick internet search on it and turns out it is pretty common, along with the issue of bearings not staying seated in the case. Loctite 648 & 680 seem to be the ticket.
Here's a couple of threads I found on the issue:
http://dirtrider.net/forums3/threads/loctite-for-main-crank-bearings.146835/
http://vintagesleds.com/bs/index.php/topic,109017.0.html
Attachments
smitty
PR Addict
#2JIS is closer toIn the past there have been times that I've needed a really good flat surface for checking the trueness of things, so when this subject of the surface plate was brought up by Sharc, it rang a bell with me... need to get this. I did order one, received it and you can see it in the crankshaft pic's I just posted. Not a real expensive one, but accurate enough for my garage.
Well on a side note, this got my mouse brain wheel turning and I remembered seeing something at work a few years back that caught my eye. We have an abandoned lab that never gets used anymore. A few years ago they tore out an island work counter. They removed the bench top and just set it aside for scrap, and been setting there since. I remembered it very well. I went back and checked on it, and sure enough, still there. It's made of some sort of black material that is heavy as granite. I believe it is 1-'1/4" thick and heavy as hell. But the top is incredibly precision smooth. It's not that large and will fit perfectly on my work bench. Needless to say, I grabbed it up and got a scrap pass.
I just received the Hozan JIS screwdrivers at the house today as well. I quickly realized that I will have to do more digging and make another purchase because there is no large size screwdriver in the set.
I'll have to double check but not sure that the largest one in the set is big enough for the engine case screw heads.
Enough for tonight...ugh!
smitty
PR Addict
sorry for that last post screwup,I ordered 2 JIS #2 off ebay motion pro I think they are closer to #1 Phillips and mostly usless going to try #3'
on the bearing clearance issue I had a Suzuki TS90 that had the same issue on decell you could hear the bearing spinning free of the crank it had been going on for some time required crank replacement
on the bearing clearance issue I had a Suzuki TS90 that had the same issue on decell you could hear the bearing spinning free of the crank it had been going on for some time required crank replacement
NQ1965
PR Elite
So here we are again. Been a while since we've visited this, but there has been some activity.
Going back to my earlier post, I still wasn't completely satisfied with the idea of just using the Bearing Mount Loctite. The thought of still having the clearance gap from the wear still bothered me.
Here is the best solution I could come up with to salvage the crank without major machine work. I done some searching and reading on the internet, and then had some good conversations with some of our really seasoned mechanics at work. Those that have lot's of years experience with engines. An idea that was brought up was the concept of "raising the metal" . I had never heard the term before. And one of the methods to "raise the metal" was by knurling the shaft.
I then done some digging and found that you can purchase hand knurling tools to accomplish this without having to chuck it up in a lathe. So I dug, found one and placed the order. The biggest frustration was it took two months to receive it. Made here in the US, and bought through Penn Tool and Machinery in New Jersey. ($188.00)
I then had to do some more deep reading. I learned that the fit between crankshaft bearings and the actual shaft itself is technically referred to as an "Interference Fit". This means that the gap between the shaft diameter and the bearing internal ID is a range between 0.001" to 0.0025" (average 0.0015") clearance. That is tight!
So at this point once I knew that I would need to "raise the metal" of my crank to make this up.
I won't lie.. this took some patient measuring and tweaking with the Emory cloth and my micrometer. And after quite a few trial and error assemblies with the case halves I feel like I got it. Once finished, I had to use my crank puller to install the crank and pull the case together. We'll just have to see how it holds up over the long haul.
I've had this engine apart so many times now I can just about do it in my sleep. I also know that now that I have a good handle on it, I can begin grabbing up parts to build me spare engines to keep racing this Kawasaki, and any in the future that I decide to adopt.
Another discovery was that the idler gear between the clutch and the kick starter gear was missing a thrust washer, so I had to order and now waiting on that to continue getting it together.
One way or the other, she will be on the starting line at Vintage Days!
MarctheSharc
PR Founding Father
Not too hip on this idea. More when I get some time.
NQ1965
PR Elite
Not too hip on this idea. More when I get some time.
Do you think I'm losing too much surface contact?
After knurling the shaft, on one of my trial fits I did use the Loctite when I pulled my case halves together. And then when I later decided to pull it back apart again, I had to press the crank out of the case half and the bearing came out with it. I had to use a bearing splitter/puller to get the bearings back off of the crankshaft. Not wanting to chance that I may have damaged the bearings I replaced them with another new set. There wasn't any doubt whatsoever that the shaft had a firm fit in the bearings.
Last edited:
Dano762
PR Addict
God I love finhead motors.... They are so simple.
I think I'll buy me more.
MarctheSharc
PR Founding Father
In a nutshell - yes, that's my concern.Do you think I'm losing too much surface contact?
MarctheSharc
PR Founding Father
https://www.biltwellinc.com/wtf/201...-and-why-we-dont-do-it-on-biltwell-handlebars
I'm just grabbing stuff right now - I know your situation is not this, but i think the same principals will apply
I'm just grabbing stuff right now - I know your situation is not this, but i think the same principals will apply
Last edited:
NQ1965
PR Elite
I'm tired just reading all of the stuff you've been doing Mike.
Would love it if this were another racers post that I was reading on this.
This rebuild has even worn out my wife.
MarctheSharc
PR Founding Father
NQ1965
PR Elite
Can't say that all of this hadn't crossed my mind. Many times I've had machine shafts that have had to be welded up and machined back down for bearings.
If I weren't up against it on time I would split again and send it out. As it is right now, I only need to get one 45 minute hare scramble race out of it, so I 'll have to chance it. At this point the tear downs are easier than before.
I just hope that later when I do send it out, I can get it reworked without an issue or too high of costs.
That's a good info clip you got there, wish I had seen it before.